ADVERTISEMENT
Step-by-Step Instructions for Christmas Fudge
Step 1: Prepare Your Pan
- Line the Pan:
Use a 9×9-inch square baking dish and line it with parchment paper, leaving an overhang on the sides for easy removal. - Lightly Grease:
Grease the parchment paper lightly with butter or non-stick spray to prevent sticking.
Step 2: Melt the Chocolate Base
- Combine Base Ingredients:
In a medium saucepan over low heat, combine the semisweet chocolate chips, sweetened condensed milk, and butter. - Melt Slowly:
Stir constantly with a silicone spatula or wooden spoon until the mixture is smooth and glossy. Be patient and avoid overheating to prevent the chocolate from seizing. - Add Flavoring:
Remove from heat and stir in the vanilla extract and a pinch of salt.
Step 3: Add Festive Flair
- Incorporate Add-Ins:
If using chopped nuts or candy canes, fold them into the melted chocolate mixture for added texture and flavor. - Layer or Swirl (Optional):
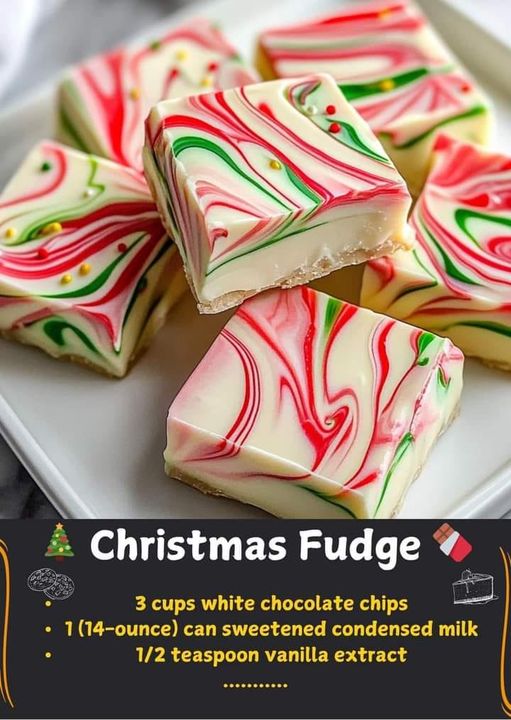
For a layered look, pour half the chocolate mixture into the prepared pan and smooth it out. Melt the white chocolate chips separately and pour them on top, swirling gently with a knife to create a marbled effect. - Top with Sprinkles:
Sprinkle the surface with holiday-themed sprinkles, additional crushed candy canes, or any other festive toppings.
Step 4: Chill and Set
- Refrigerate:
Place the pan in the refrigerator and let the fudge set for at least 2-3 hours, or until it’s firm to the touch. - Check for Firmness:
The fudge should be solid enough to cut cleanly but still have a creamy texture.
Step 5: Slice and Serve
- Remove from Pan:
Use the parchment overhang to lift the fudge out of the pan and transfer it to a cutting board. - Cut Into Pieces:
Use a sharp knife to cut the fudge into squares or festive shapes. For cleaner cuts, wipe the knife clean between slices. - Arrange and Serve:
Place the fudge pieces on a holiday platter or package them in decorative boxes for gifting.
Please Head On Over To Next Page
ADVERTISEMENT
